Backups on the Amiga X5000
Updated:
Happy New Year everyone! I’ve got big plans for my Amiga projects in 2019, but thought I’d start off the New Year with a blog post on a not-particularly “exciting” topic, but an important one nonetheless: Backups. As I am experimenting more with my X5000 and Amiga OS 4.1, I’ve been getting particularly “twitchy” that I didn’t have a solid backup/restore plan in place, particularly as some of my experiments will invariably go wrong and I’ll need a way to roll back my changes to a known-good state. I spent a few days researching and implementing a backup strategy that’s ideal for my needs and hopefully there will be something of use to other Amiga owners too.
My requirements were:
- Create a spare bootable system partition that always has a working copy of Amiga OS 4.1 complete with all my settings and tools
- Backup my system and other partitions to directories on another disk
- Create archive files of these backups so they can be stored on another system
I’ll run through my steps for each of these areas in turn. Firstly, I wanted to create a spare bootable partition so that even if I totally screw up something in the AmigaOS boot process, I can still get back to a working system. To do this, I decided to use some of the spare space I had left unpartitioned when I set up my X5000.
Preparing the backup boot partition
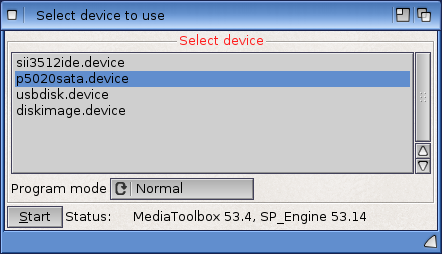
The first step was to run Media Toolbox and select my internal boot device which is connected to the on-board p5020 SATA ports:
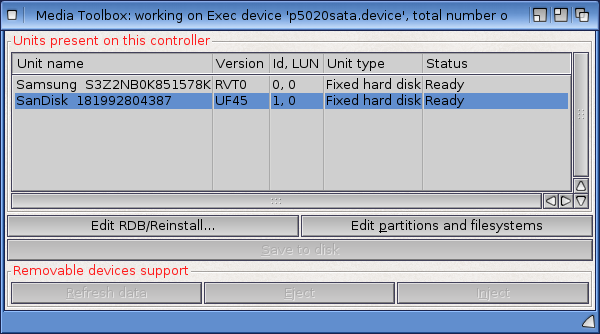
Next, I selected my boot device which is the 256GB Sandisk SSD installed by AmigaKit:
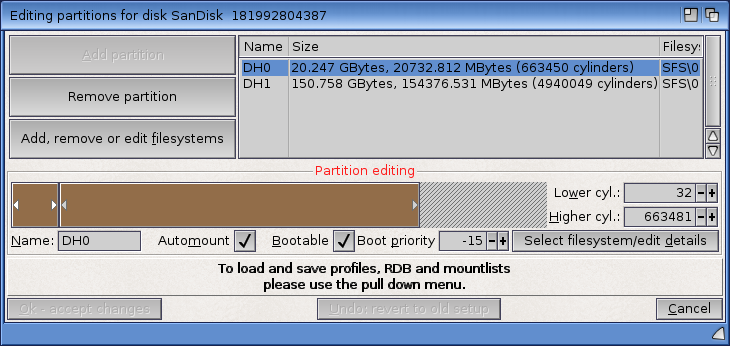
And here’s what my partition layout looked like, with a decent amount of space free for a secondary boot volume:
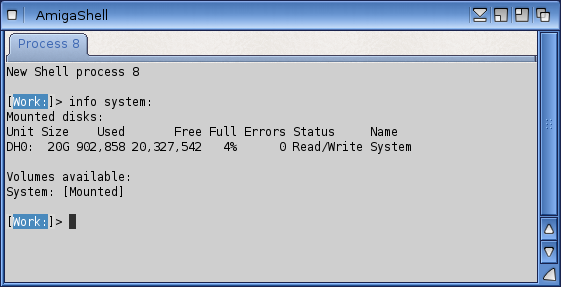
I know AmigaOS is a pretty light operating system, but I first checked how much space was actually in use on my current System volume using the AmigaDOS info command:
Not bad, just around 900Mb in use. I decided to create a 5Gb partition for my new boot volume; this was way more than I needed but then disk space is cheap, and it’s always better to have spare capacity in the future:
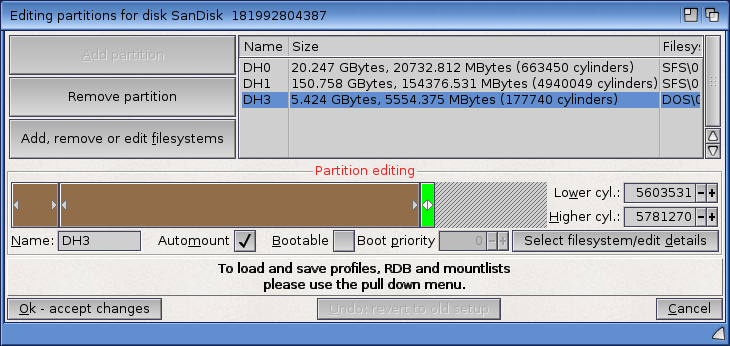
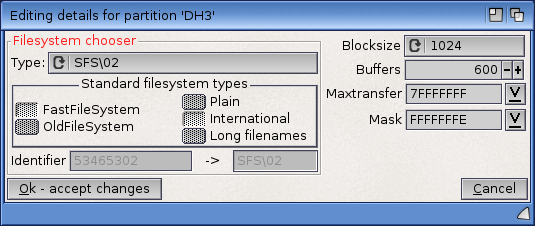
I named this partition DH3 as I’d already used DH0 to DH2 for my System, Software, and Work volumes. I then set the filesystem to SFS2 as that’s what I’m using on all my other volumes and it’s proven to be reliable so far. It doesn’t however have any recovery tools unlike NGFS, which means that a backup plan is even more important as I’ll have no choice other than to reformat and restore data if any corruption occurs!
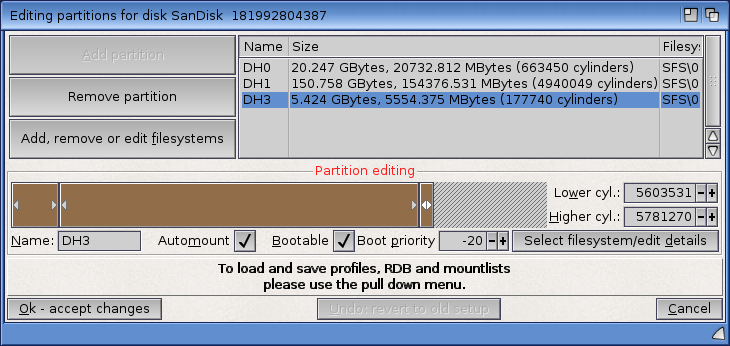
The next step was to make sure that I had set the various options needed to allow booting from this new partition. I ticked the “Bootable” checkbox, and gave it a Boot Priority of -20, as that is lower than my current System: volume, which has a boot priority of -15. So this means it should only be picked automatically as a boot volume if my main system volume is unavailable:
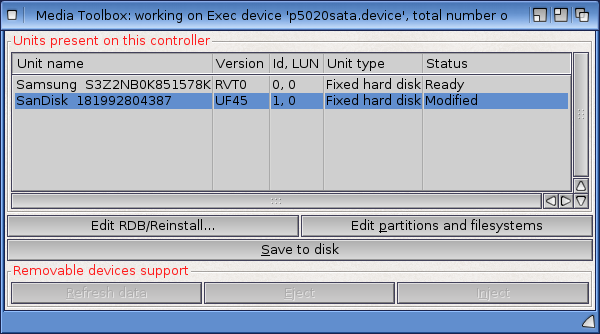
With that done, I clicked on “OK - accept changes”, and back at the unit selection screen I clicked on “Save to disk” to write the new partition table to the SSD:
I then formatted the volume (using “quick format” - never do a full format of a SSD!) in Workbench, named it SystemBackup and I was ready to start copying data over.
Making the backup
I wanted to make the backups using something a little more efficient than the plain old AmigaDOS COPY ALL. On Unix systems, there’s a fantastic tool called rsync that can be used to archive directories by only copying over the changes between them. This means that the first time may take a little while as it has to do a full copy, but after that any subsequent runs will be much faster as only the delta will be transferred.
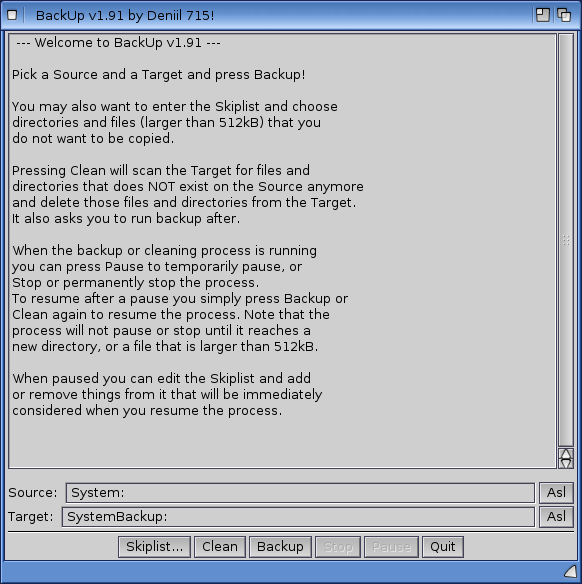
I tried a few of the available tools that can do incremental copies (as well as correctly preserve all the AmigaDOS file attributes) and eventually settled on the fantastic BackUp from OnyxSoft. It’s a 68k binary but works very well on both classic and NG systems - another great example of how AmigaOS 4 can run old system-legal classic software. It has a nice GUI for one-off operations and can also be scripted from the CLI (more on that later). I unpacked this tool into my usual Software:Programs directory, and ran the first backup manually. I did this by picking the Source and Target volumes and clicked the “Backup” button:
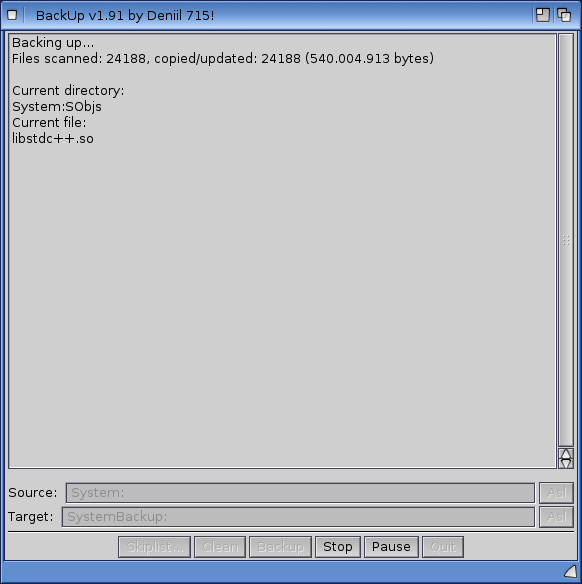
This started the backup running and produced some short output showing which files were being worked on:
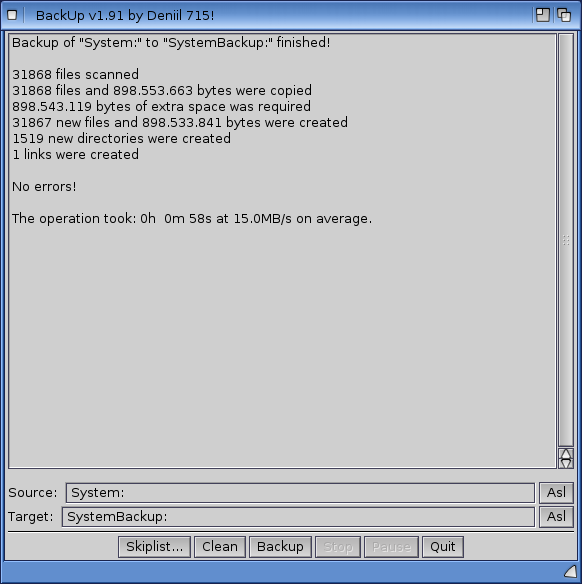
And a short while later, the backup had completed:
I then ran the backup again to verify that incremental backups were working; sure enough, it completed in a fraction of the time and only transferred modified files.
Uboot modifications
Now I had my backup boot partition ready, I somehow had to find a way to boot into it. On my classic Amigas this would have been straightforward, using the “early boot menu” you can access by holding down both mouse buttons when powering on the system. There didn’t appear to be anything like this in the Uboot firmware on the X5000, though. The only options I saw on that menu are for booting into AmigaOS, MorphOS or Linux. The “Boot options” submenu just lets you pick whether to boot from HD, USB or optical media. So I knew I’d have to mess around with Uboot configuration directly, using the “Command Line” option from the boot menu.
Update : Trevor Dickinson of A-EON has provided a comment below that corrects my assumption above! There is apparently an early boot menu, you just have to press the mouse buttons together at the right time. Many thanks Trevor, for the update! My steps below are still valid, but it’s good to know about this extra environment. I’ll explore this in more detail later on…
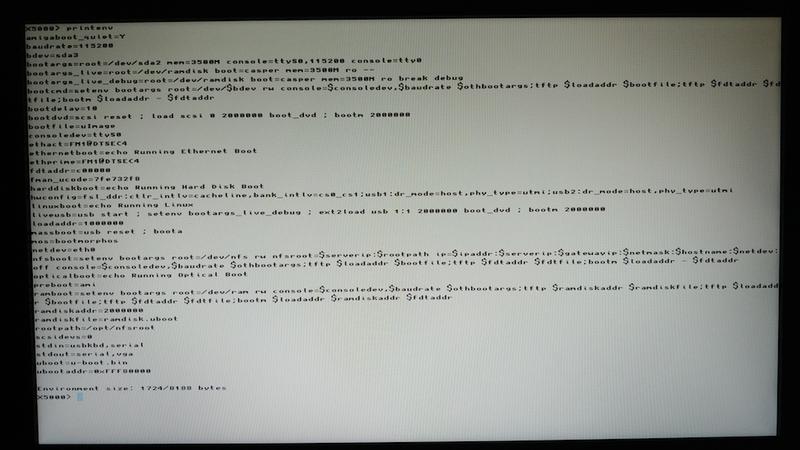
The first thing I wanted to do was run a printenv command from Uboot and note the values. This is very important as it’s quite possible to make your system unbootable by changing things here, so having a record of settings is very important in case you need to roll back your changes:
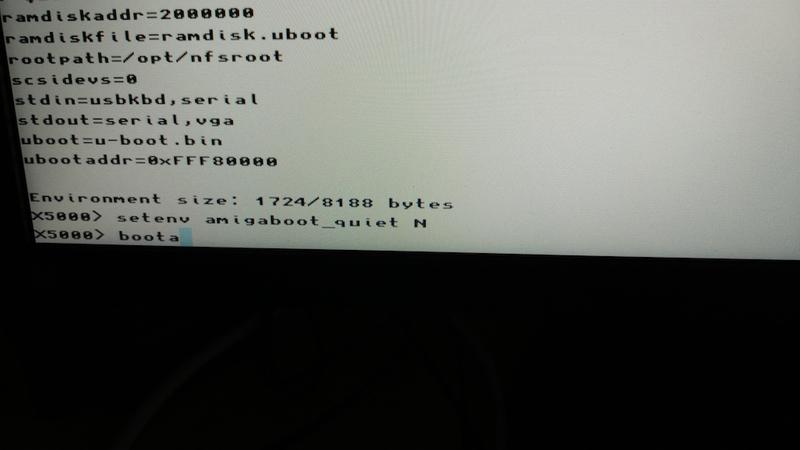
The first parameter caught my eye - amigaboot_quiet. I had no idea what this did, but I hoped it would show some more verbose output during boot. I thought I might then see something in the boot logs which might point me in the right direction to set up multi-partition boot. So I set this value to N (hopefully to disable “quiet booting”) using the setenv command, and then ran boota to start the AmigaOS boot process off:
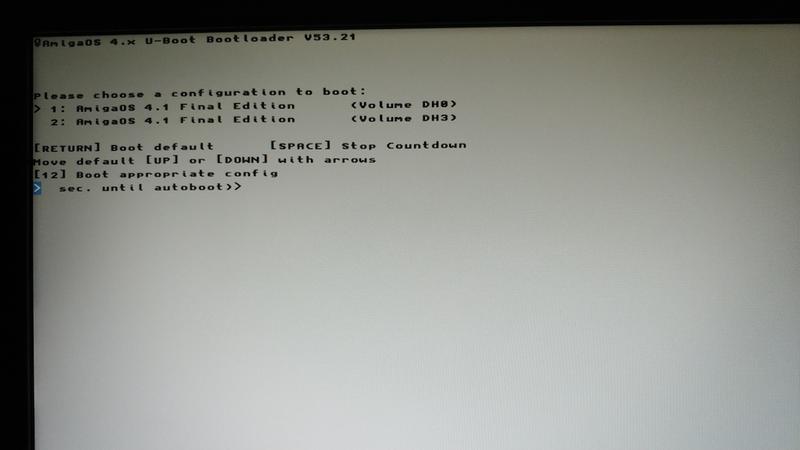
By sheer luck, this turned out to be exactly the parameter I was looking for! Now, when the boot process starts, I get a menu allowing me to pick a boot volume:
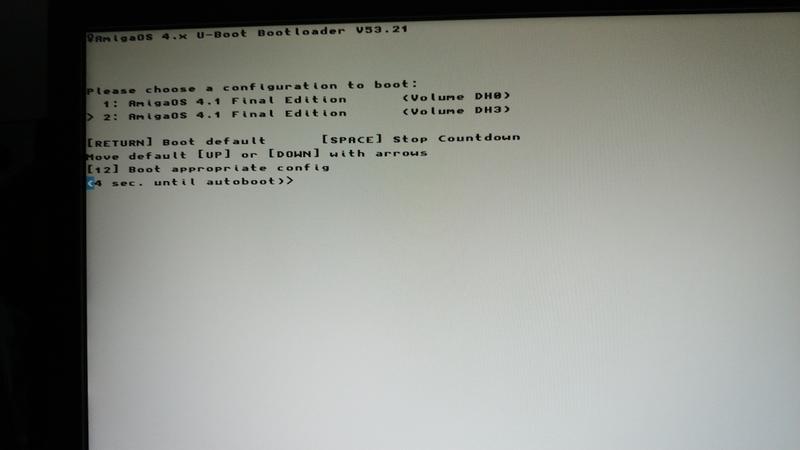
I was really happy that my first guess seemed to take me in the right direction :) I then simply used the cursor keys to move the selector arrow down to select the new backup boot volume, and pressed Return:
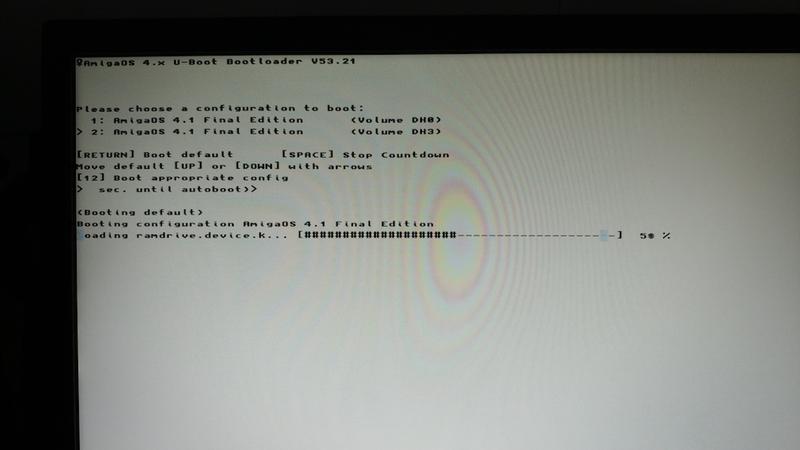
This started booting and loading kernel modules:
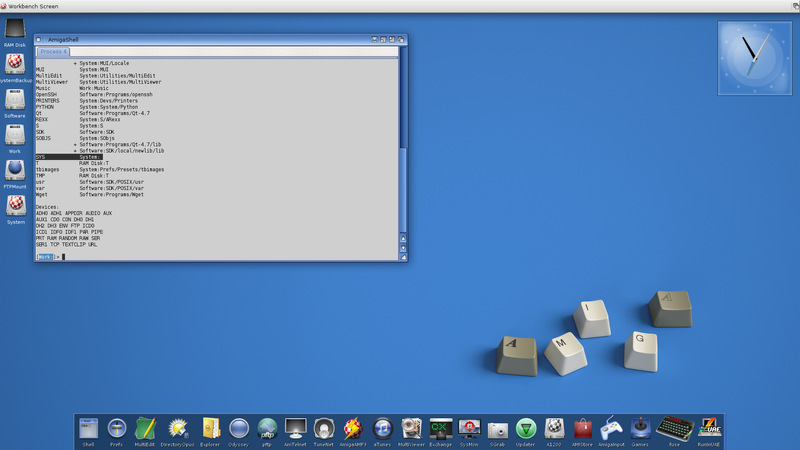
And then a few moments later, I got the OS 4.1 splash screen and then my Workbench desktop appeared. I celebrated briefly, but I quickly noticed there was a slight problem as it didn’t appear to have worked as I had expected. The system did boot, but when I checked my assigns I saw that SYS: (the boot volume) was still pointing to my System volume on DH0, along with all my other assigns:
This meant that although it appeared that the Kickstart kernel and modules etc. had been loaded from my backup partition on DH3, the boot had continued from DH0, run the startup-sequence from there and so on. So I was getting closer, but there was still obviously a last piece of the puzzle to put together.
I then went back to reading more about Uboot and the AmigaOS 4 boot process. I eventually stumbled upon a thread on the Amigans.net forums where someone was trying to do exactly the same thing as I was!
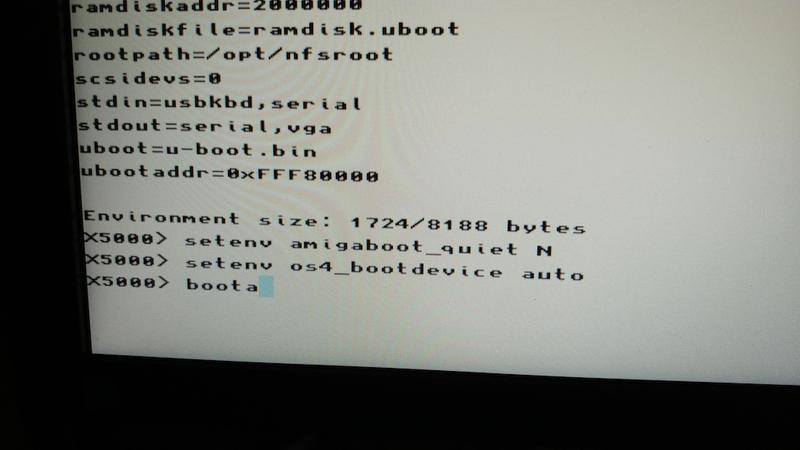
It turns out there’s one more important variable to set: os4_bootdevice should be set to auto. With this in place, the boot sequence will continue from whichever volume the Kickstart and Kicklayout file were loaded from. Otherwise, it appears the boot process will continue from whichever partition has the highest boot priority - which would always be my original installation on DH0:. I tried setting the two Uboot variables again before trying to boot from the new partition again:
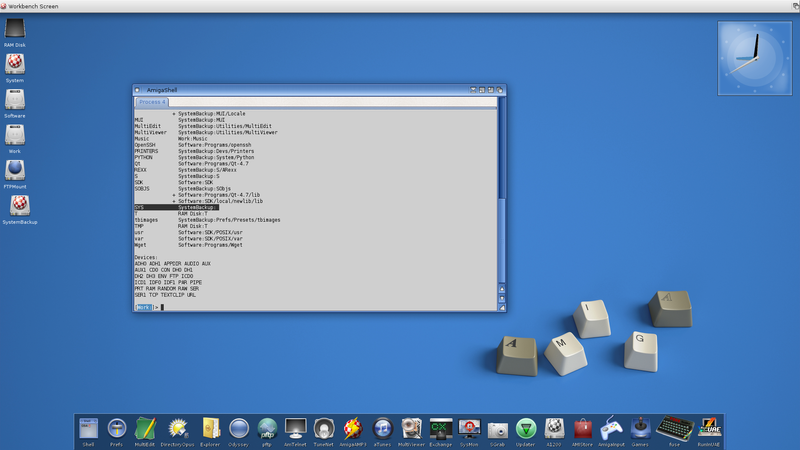
I again picked the backup partition from the boot menu and this time, I had success:
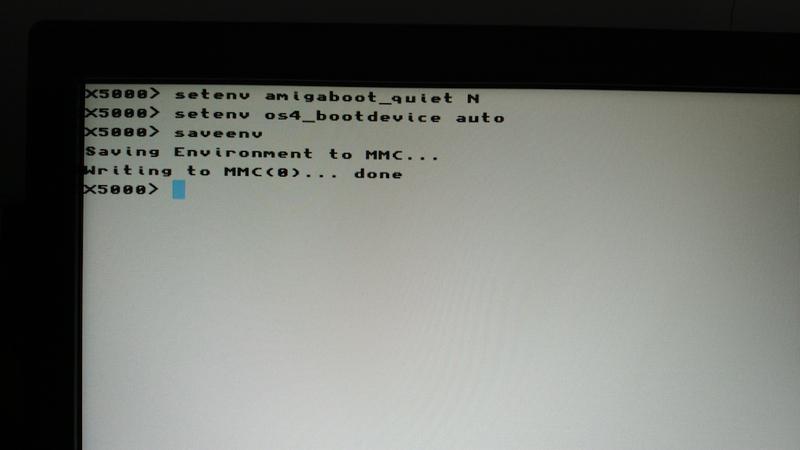
You can see above that my SYS: volume is now pointing to my backup volume, along with all the other assigns. With that work verified, I went into Uboot for the last time, set the two variables I needed and then saved the configuration to the flash device with the saveenv command to make my modifications permanent:
Now, every time I boot I get the boot selection menu and can pick which partition to boot into.
Remainder of backups
Now that I had my bootable System: backup partition, I wanted to also create clones of my other volumes to make sure I have backups for my Software: and Work: partitions. For this, I just wrote a very simple AmigaDOS script (saved into my Work:c directory for all my personal scripts and tools) that runs OnyxSoft BackUp in CLI mode. It first updates my bootable clone, then clones everything (including the System volume again) into a Backups:Clones/ directory on a separate disk. This means that even if the SanDisk SSD holding my volumes dies, I still have a backup on another disk:
SET backup_bindir Software:Programs/BackUp

SET system_source System:
SET system_clone SystemBackup:
SET software_source Software:
SET work_source Work:
;
; Bootable clone
;
echo "Cloning $system_source to $system_clone"
$backup_bindir/BackUp SOURCE $system_source TARGET $system_clone BACKUP AUTOQUIT

;
; Backup clones on separate Backups: volume
;
echo "Cloning $system_source to Backups:Clones/System"
$backup_bindir/BackUp SOURCE $system_source TARGET Backups:Clones/System BACKUP AUTOQUIT

echo "Cloning $software_source to Backups:Clones/Software"
$backup_bindir/BackUp SOURCE $software_source TARGET Backups:Clones/Software BACKUP AUTOQUIT

echo "Cloning $work_source to Backups:Clones/Work"
$backup_bindir/BackUp SOURCE $work_source TARGET Backups:Clones/Work BACKUP AUTOQUIT

;
; Display backups usage
;
info Backups:
This took a long time the first time I ran it, but thanks to BackUp only copying changed files, it now takes only a minute or so each time I run this script.
I was now feeling a lot safer with my volumes all backed up, but I had one more step to complete, namely taking these backups and turning them into single-file archives which I could then transfer off my X5000 to another system, such as my home NAS and S3 for off-site backups. After all, it’s no good having all your backups on one system if that system completely fails or is damaged in some way. My years of running Unix systems professionally has taught me the “3-2-1” backup rule: A good backup plan must have at least 3 copies of the data, 2 of which should be on different media, and 1 should be stored off-site.
Archives
So, the final step was working out how to take these backup directories and archive them into single files. My first thought was to use LHA which is pretty much the standard Amiga archival utility. But there was a problem: As it turns out, most “classic” Amiga software is not large-file aware, which means that LHA could only create 2GB archives (which would have been unthinkably huge back in the day!).
This was OK for my system volume which was under 1GB in size, but it would not suffice for my Software and Work volumes which were much larger. I went searching for an alternative solution which could handle creating large files, as well as preserving all the important Amiga filesystem attributes. I posted a question over on the helpful AmigaWorld forums and quickly got a suggestion to try AmiDVD which sounded like a good tool to try as it’s bundled with AmigaOS 4.1.
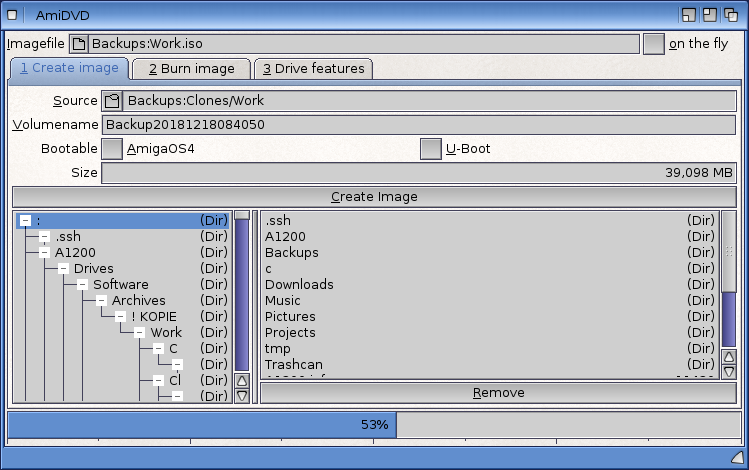
I’m pleased to say this worked out very well, and was simple to use. I just used the “Create Image” tab, and tested it first by using my Work: volume which was around 40GB in size:
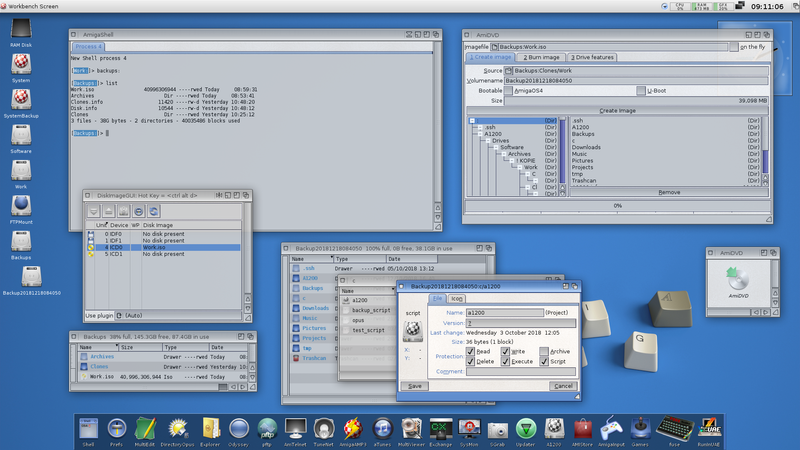
With this done, I then mounted the resulting .iso file and browsed it to verify that my files were all present and still had the correct filesystem attributes set. In the screenshot below you can see the ISO file mounted as a virtual drive, and you can see from the shell and Workbench window that the ISO file is around 40GB in size. I also browsed to the backup of my Work:c directory where I work on my own scripts and verified that the AmigaDOS filesystem attributes were still set correctly:
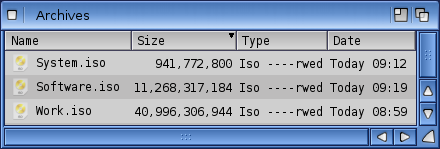
I then just had to re-run through the process again to create backups of my other volumes. Here’s the results, showing again the large filesizes created with no problem:
I could then transfer these files off my X5000 and onto my Synology NAS and other systems. I would ideally have liked a tool that could be driven from the command-line so I could include in my backup script, but AmiDVD is very straightforward and it doesn’t take much effort to click a few times to create updated backup archives. Still, I’ll continue searching and if I find something I can use from the shell I will update this blog post to cover it. Maybe mkisofs would be a good starting point…
Anyway, now I have a solid backup plan in place (and learned a lot more about my X5000 and the world of Next-Gen Amiga systems!), I can press on with having fun experimenting with my new system and I look forward to blogging more this year. Hope it’s a great year for all you Amigans out there and remember: Only Amiga Makes It Possible!
The opinions and views expressed on this website are my own and do not necessarily reflect the views of my employer, past or present.

